Health & Fitness
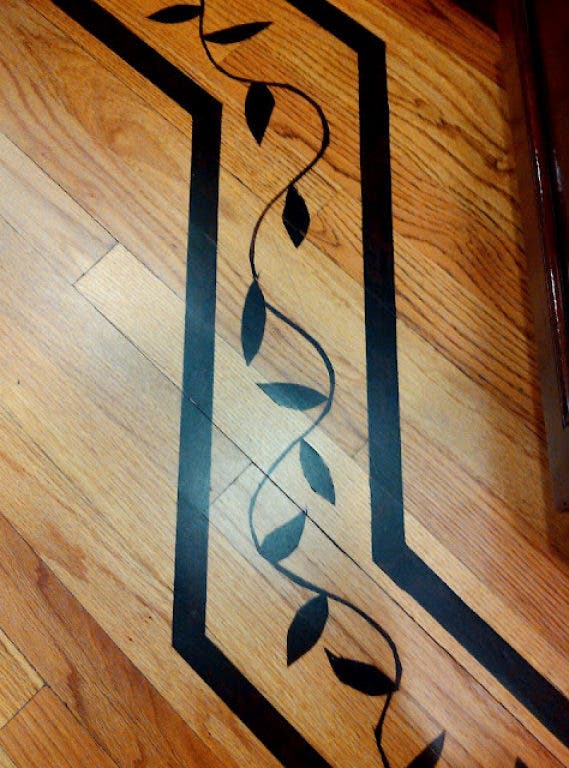
Hand stained faux inlay on a wood floor
The expensive look of intricate inlay on a wood floor can be easily done with stain and patience.


Yesterday I had to repair some work I had rendered in a home in a Chicago suburb. The owners are down-sizing...kids are off to college. It's odd for me to see these kids heading off to college now...the last time I was there they were toddlers. Funny how they can grow up and yet I feel exactly the same.
Anyway....my repairs were minor and it took me a day to wander around and fix mostly drywall tape cracking and touch up the faux art. I was, however lucky to see the wood floor I had hand stained - looking nearly the same as it did when I completed it 15 years ago. These photos are of the floor 15 years after I rendered the art. This is a good example of how well the art work maintains it's beauty.
The floor seems to have lost a little of it's high polish but the detail of my attention and art were still there. I had isolated a stain in a specific border pattern and created what appeared to be as an expensive inlay of a darker wood.
To do this I covered the entire floor with a rosin paper. The floor was sanded smooth and the wood was very porous so to prevent any oils from penetrating the substrate I masked off the entire area and worked in clean white athletic socks. Like a surgeon, I exposed only the area I was planning to work on - the area where the art was to be rendered. I drew the pattern in pencil first, the used a heavy duty box cutter to score the pattern into the floor. I cut only about a 1/16" deep into the floor. The goal was to cut the wood fibers on the surface and create a tiny moat for the stain. This prevented a bleed of color into areas I didn't want the stain to travel to. It gave me the ability to give the illusion of intricate inlay.
It took me a week...draw the pattern, score the wood, stain the area, reseal and move forward. The results speak for themselves year after year.