Community Corner
Part 2: Big Plans, Small Garden
A continuation of Patch Green Thumb columnist's adventures transforming a client's garden.
Read Part 1
Wall
Once the plans for the transformation of the retirement residence were finalized, the work began. We started by building a low 100 foot long wall of colonial bluestone that surrounded the entire property. The wall did double duty leveling the grade and also defining the garden's boundaries with a framework.
Find out what's happening in Hunt Valley-Cockeysvillefor free with the latest updates from Patch.
Grading
The soil was graded so that it sloped away from the residence and a pathway was defined with soil. New drainage pipes were buried and ended with a pop-up cap which would allow water to exit by pushing up the cover when it rained.
Find out what's happening in Hunt Valley-Cockeysvillefor free with the latest updates from Patch.
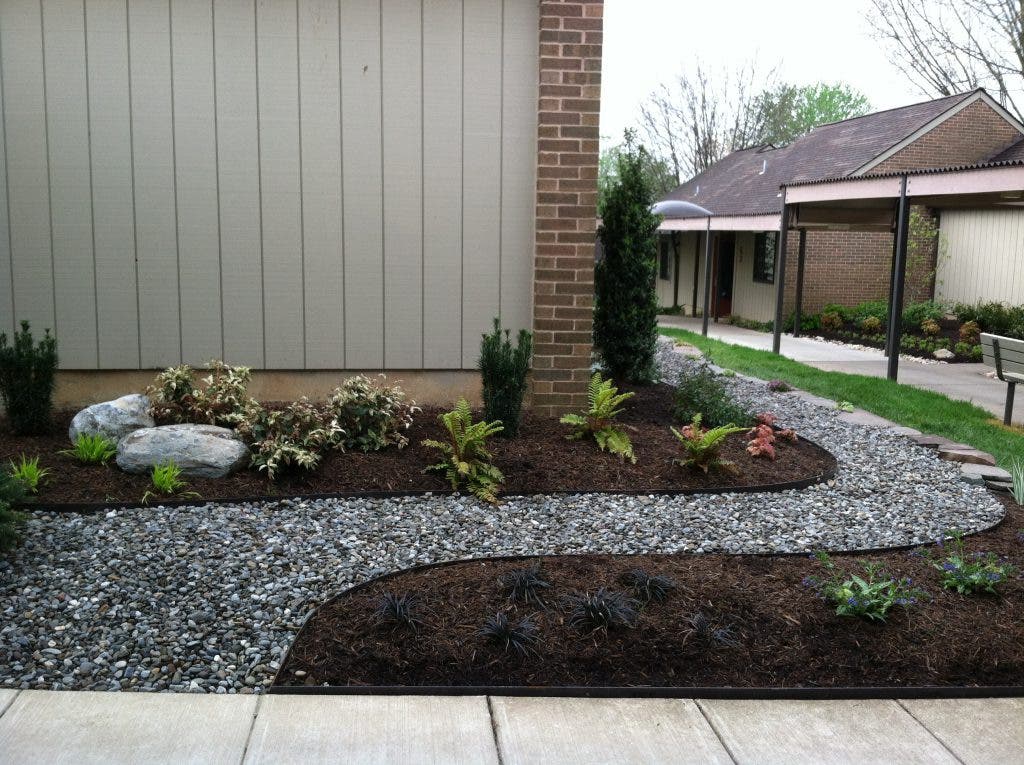
Pathway
Heavy metal edging was shaped and tamped into place to edge the pathway and keep the river jack (large rounded stones) from shifting. Landscape cloth was cut and pinned into place in the pathway to keep the stone from sinking into the soil underneath. The river jack stone was spread in a two inch layer throughout the pathway and tamped down firmly.
The Patio
Large bluestone pieces were selected and pieced together on a bed of gritty stone dust to give the patio stability. Additional stone dust was feathered in the joints to keep the stones from shifting. The patio slanted slightly away from the house so that water would drain off and not pool around the foundation.
Planting
The large shrubs and trees went in first and then the perennials were planted and watered in place. The smaller perennials along the new wall were planted in small pockets that were naturally created when the wall was built. Eventually they will grow to cascade down the wall face.
Irrigation
Once the plants were situated, digging for the irrigation began. Three zones were selected according to the amount of sun and water requiremnts. The main irrigation pipe had to be buried at least a foot under ground as well as forced under an existing sidewalk. To make watering easier, an additional water faucet was installed at the far end of the garden. From the main water pipe, brown drip irrigation hoses were placed and wound around the plants, which were then fastened to the ground with wire staples. A control box where the three designated zones terminated was situated in a nearby shed where it could plug into the existing electricity feed. All of this was carefully done without disturbing the new plants in the ground. Drip irrigation brings the necessary water directly to the plants and slowly disperses the water on a timed basis. It is a great water saving device as the water goes exactly where and when it is needed. A layer of mulch was applied over the irrigation hoses to hide them from view.
Design Solutions
Because of the large presence of pathway gravel in the design, I created a Zen like planting scheme with small grasses, graceful trees, and minimalist plantings. The gravel also served a purpose of allowing space and light around the plants, showing them off and allowing easy maintenance. The wall served as a boundary and framework and contributed enormously to the overall design. Ultimately, a new garden should look fine when first planted, quite good in three years, and at its best in five. Go to thegardendiaries.wordpress.com to see more pictures.