Health & Fitness
Gardening 101: How to Dig and Divide Bearded Iris
If the thought of digging, dividing and replanting your iris make you uneasy, check out my easy "step-by-step" instructions.


If you grow iris, you know that every 2 or 3 years they need to be lifted out of the ground, cleaned up, inspected and replanted. I have a fondness for these mundane garden chores- they’re therapeutic.
If you haven’t the confidence to tackle this task, let me help. With words and photos I’ll make it as easy as pie!
The first thing you need to know is that there are certain times of the year in which to tackle this job. Common sense dictates that you don’t do this in spring. If you did, you would lose any blooms that would be produced in May.
Find out what's happening in Town And Country-Manchesterfor free with the latest updates from Patch.
The general rule is to proceed at least 6 weeks after the last bloom. I try to clean up my iris in late August to early to mid September. That still gives the iris enough time to root in before winter hits. The tools you’ll need are minimal: a pitchfork or shovel, hand pruners and a hose.
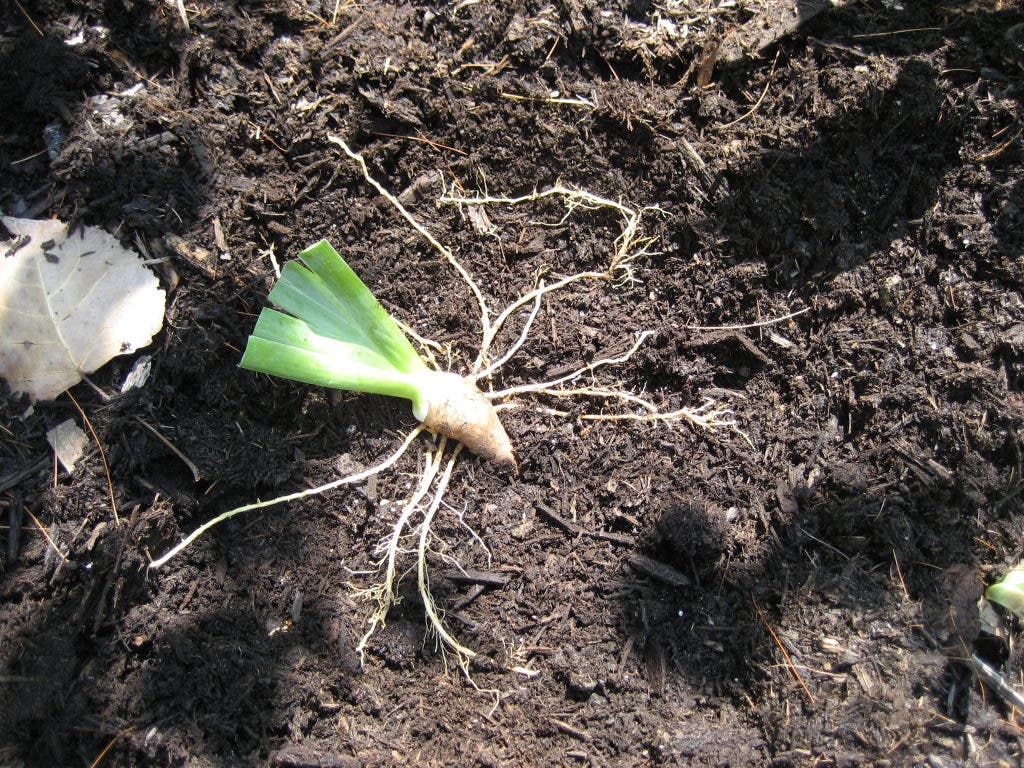
OK, let’s begin with the first step- getting the iris out of the ground. As you look at your clump of iris, try and visualize how much space the rhizomes encompass in the border. What is a rhizome, you ask? Wiki says: a rhizome is “A horizontal stem of a plant that is usually found underground, often sending out roots and shoots from its nodes.”
Find out what's happening in Town And Country-Manchesterfor free with the latest updates from Patch.
Not only iris have rhizomes, many grasses, ferns and bamboo do as well.
Now, back to the job at hand. Using your pitchfork or shovel, place it in the ground, digging a circular line about a foot along the outside edge of the clump of iris. Iris are very shallow rooted, so don’t worry that you aren’t digging very deep. With your tool of choice, lift the entire clump of iris out of the soil, making sure you haven’t left any rhizomes behind. Place the clump of iris in an area where you can inspect them, clean them and trim them. The first job is dividing them.
You’ll notice that the iris form clumps of rhizomes. Some of the rhizomes will naturally pull apart from the others. This is absolutely OK.
Now you’re going to need that hose. Wash the iris, looking for any mushy spots or areas where the rhizome looks like something made a hole in it. An iris borer created that damage. You will need to trim away (use a sharp knife or pruners) and pitch any portion of the rhizome that shows borer damage or is mushy. Don’t compost it; place it in your yard waste trash bag.
In order to prevent borers from getting the iris you’re cleaning up, you might want to sprinkle some powdered sulfur on them. It’s easy to find at any nursery. Some people also wash the rhizomes in a 10% bleach solution. It’s totally up to you if you choose to do this. If the infestation is minor, I leave the iris “eau natural.”
Now that the soil, mushy areas and borers are off your iris, take a good look at the rhizomes. You’ll see some huge ones and others that are growing off the huge rhizomes. The largest of the rhizomes have already bloomed and won’t bloom again.
Snap off the smaller rhizomes off and pitch the large one. Those are the ones you’ll put back in your garden.
Have you finished inspecting your iris? Good, now it’s time to trim them.
Grab your pruners (they are sharp, aren’t they?) and get ready to trim. You want to trim any dead leaves or old flower stems off first. Then, you want to cut each leaf, straight across, to 3 inches tall. That’s simple enough, isn’t it?
Now it’s time to replant. This is the best time to amend your soil. You can purchase bags of compost at any nursery or big-box home improvement store in the event your soil needs a boost.
Remember the area where you dug the iris up? That’s where we are going to place the compost. Use your shovel and enlarge the hole. Place some compost in the soil, working it in and mixing with the soil already there. It’s kind of like adding eggs to a cake.
This will benefit your iris tremendously, so don’t skimp on this step. Finished? Good. Let’s plant!
Each clump will be planted separately. Mound the soil, leaving a depression where the roots will be splat out. Iris likes to have the rhizome barely covered with soil. The experts’ say, “Iris like to bake in the sun.” So do I!
Cover the roots, leaving just a small amount of soil on the rhizome. Success! You’ve replanted your first iris!
Continue in the same manner, leaving space around each iris to grow.
To make the bed of iris look even more spectacular and organized, you can plant having all the iris “fans” facing the same way.
Don’t fret if you can’t get to all the iris in one day. They can be left out of the ground for weeks, as long as they get good ventilation. Place them in a low cardboard box, like the ones you get at the nurseries. The garage is a good place for them to be stored until you have enough time to finish the job.
If you have more iris than you want, why not pass them along to family and friends? They make a great gift!
Finally, water your iris well. The most critical time for the iris to “root in” is the first 10 days to 2 weeks. Keep them moist during the first few weeks and you’ll be rewarded with glorious blooms next spring!