Community Corner
Brecksville's Handy Homeowner: How to Repair Cracks in a Concrete Driveway
Fixing your driveway is easier than you might have thought.

All summer long I pull weeds out of the cracks in our driveway, so I finally decided to repair the cracks. I really didn’t know where to start with this project, so I began by checking the internet.
There was such an overwhelming number of methods and opinions and complicated steps involving a concrete mixer attachment for my drill that I almost gave up completely on the project. So I stopped in to see if there was an easier way.
Dave Bosze is an employee there, and he really went out of his way to be helpful. He indicated that it's not that complicated, and he showed me a variety of products that could be used. All of them are ready-made and come in a tube that you insert into a standard caulking gun. Just read the labels to find the one that's right for your driveway type and repair problem.
Find out what's happening in Brecksvillefor free with the latest updates from Patch.
The concrete repair product I bought is less than $7, and other hardware stores nearby also carry these products, including Ace Hardware in Independence and Kredo Hardware in Broadview Heights. If you need a caulking gun, you can get one at Larsen Lumber or for around $5. Bosze also recommended that for larger cracks that I use a solid crack filler first, which is available in two different sizes at Larsen Lumber. It comes in a roll and costs around $7.
I read the directions on the label, but thought I’d look on the internet for more tips and instructions. Here are some recommendations from the website of one of the products available, Liquid Nails, along with some insights from my experience that might be helpful:
Find out what's happening in Brecksvillefor free with the latest updates from Patch.
- Prepare the surface by cleaning the cracks. Some websites that I consulted recommended power washing with a special concrete cleaner. I simply scraped out all of the dirt with an ice pick, swept thoroughly with a broom, then washed the area with a garden house and let it dry completely.
- Wait for dry weather above 40 degrees. This could be the most challenging part.
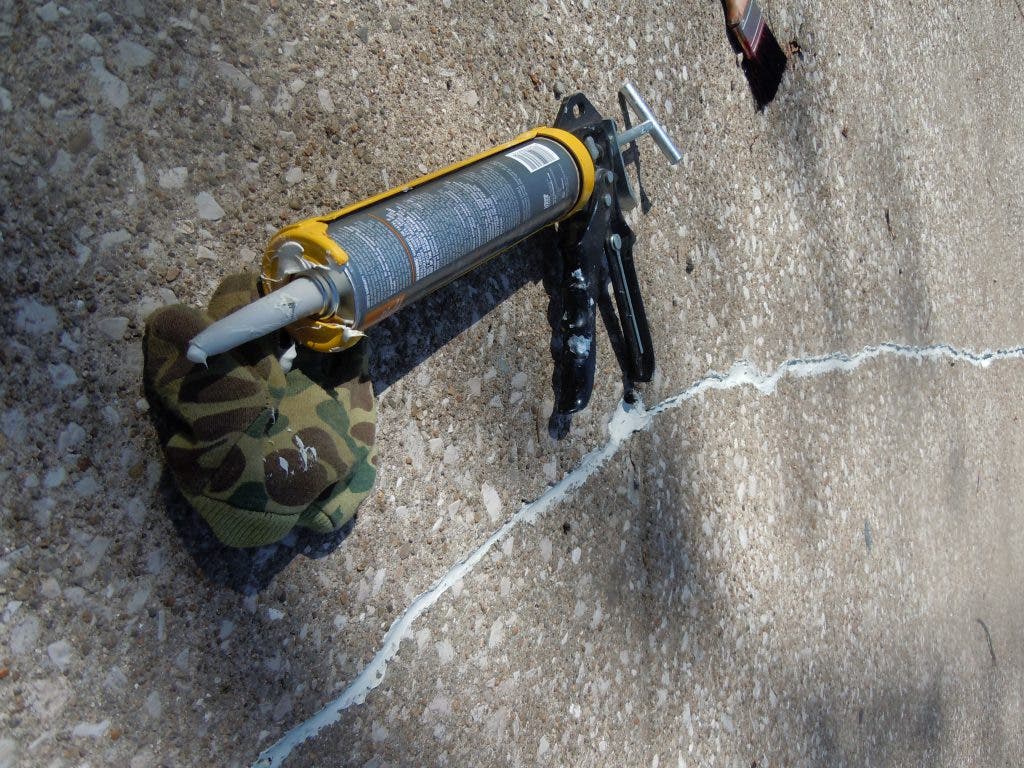
- Load the tube of concrete repair into a caulking gun. Cut the nozzle according to how large the cracks are and puncture the inner seal.
- Apply continuous bead of concrete filler into the crack. The filler is the consistency of cake icing, and squeezes out easily.
- Smooth the bead of filler with a wet, gloved finger or tool. This was much harder than it sounds because the product that I bought began to set up in just a couple of minutes and the wet, gloved finger made a terrible mess. I tried several tools, and finally settled on an old butter knife, which worked pretty well.
- Let it dry for 24 hours.
Whatever product you decide to use, make sure you read the directions and the label warnings. I got a nice start on this project; now if the weather cooperates I just might be able to get it finished. Above 40 and dry for more than 24 hours is a lot to ask for springtime in Cleveland, though.