Health & Fitness
How to stain furniture | J. Paris Designs
A quick How-To on staining and finishing a piece of wood furniture.


If my last post didn't scare you off from refinishing a piece of wood furniture, then Bravo - you're a trooper! But we aren't done yet. We merely scratched the surface (haha, did you get that pun there?). The next step is staining the beautiful wood that was unearthed in the stripping process.
For my end tables, I was trying to match the new stain as close as possible to the existing stain. Sometimes I get really lucky, sometimes not so much. I happened to have Minwax Special Walnut on hand, and from the picture on the can, it looked to be about right. Note to self: always start with a lighter stain when "testing" for exactness. You can go over light with dark, but not dark with light.
Wiping with the grain, I applied a generous amount of Special Walnut to the bare wood. It soaked in quickly, but I went back and wiped off the excess with a rag right away. Leaving stain on for different periods of time will yield different results. In this case, I wasn't pleased with the color - too red. So I mixed in a little Minwax Ebony to make it a bit darker. Wipe on, wipe off, let dry.
Find out what's happening in Cuyahoga Fallsfor free with the latest updates from Patch.
Initially, after the stain dried, it appeared kind of splotchy. It's wood, it's grainy, it has a mind of its own. Some parts of the grain will take the stain more than others. Not to worry. With a little work and sanding blocks, I was able to even it all out.
Staining is rarely, if ever, a one-shot-and-you-got-it type gig. As I stated earlier, different woods and grains take the SAME EXACT STAIN differently.
Find out what's happening in Cuyahoga Fallsfor free with the latest updates from Patch.
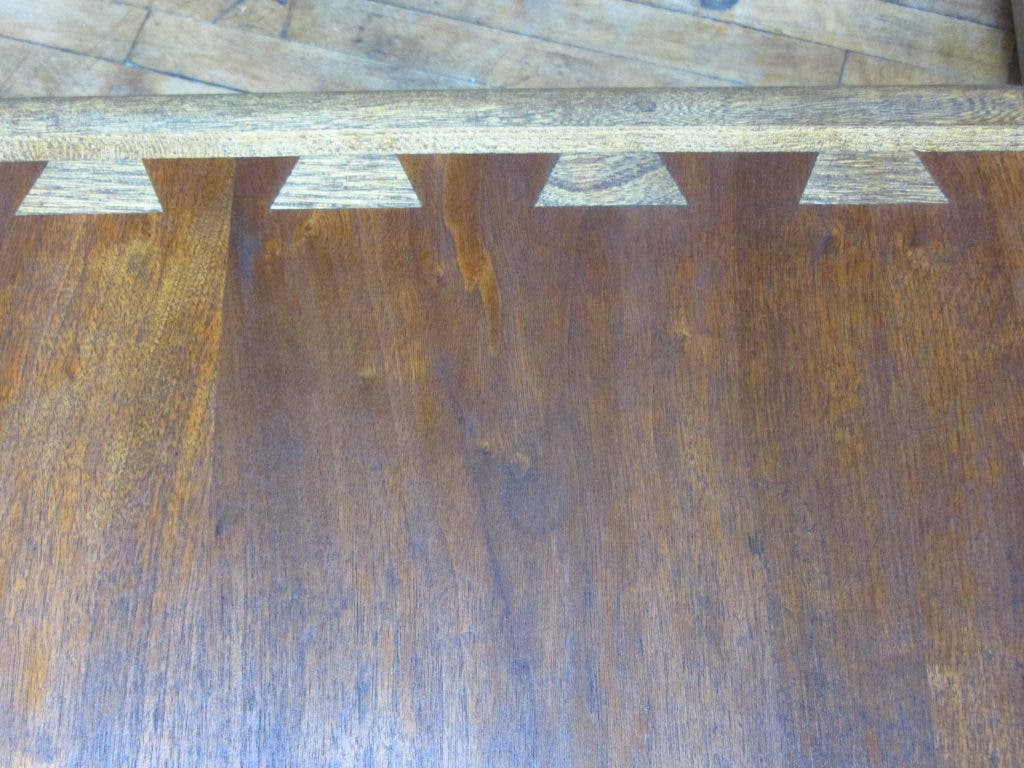
For example, check out the picture of the dove tail joints on another table I was working on. This table, to the naked untrained eye, was all one type of wood pieced together. Until I added stain. It took it completely different. Luckily, the dove joints that hold it together made for a cool look, but still. It really is something you have to "master" after many trials and errors.
I sanded down all the surfaces after the stain dried to smooth out any wood grain that had raised up from the stain. Once anything is applied to bare wood (water, stain, protective coating), it causes the tiny follicles to raise up. No one likes a hairy end table! Then comes the polyurethane/lacquer. I didn't want a super shiny surface, but still something that would protect from the occasional rogue water glass sans coaster. Keeping my coats even, I covered the surfaces with clear brushing lacquer and allowed to dry. Depending on the polyurethane that is used, sometimes I need to sand between these coats as well. These tables took three coats of poly with sanding in between each coat.
Any kind and any brand of polyurethane smells. Really bad. I once poly'd a coffee table in our basement in January and had to sleep with our SECOND FLOOR window open so we didn't asphyxiate. We froze instead! Again, you live and learn.
The finished products are a satiny smooth finish without a super high shine. The tops blend well with the rest of the body, which was my intent and hope all along.
There you have it! Are you going to jump in head first? Or perhaps give me a call (330.808.4270) to help you out? Either way, I hope this helped shed some light on how I do just a part of what I do. :)