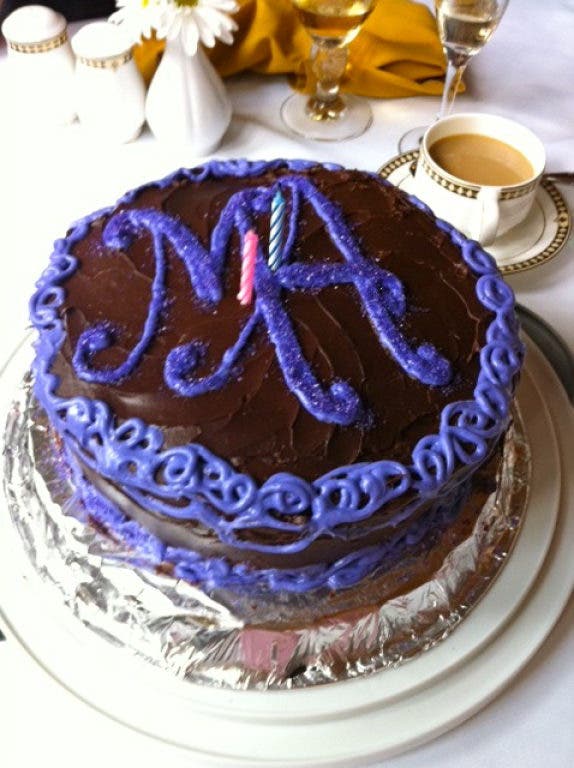


Baking a delicious and pretty cake is not a conundrum. It’s actually pretty simple when armed with a few inexpensive tools, and the most important element of cake decorating – time.
It should take about five days to fully assemble a cake, and that’s exactly what professional bakers do. Chocolatier Antoine Armrani, former pastry chef at Le Bec Fin in Philadelphia and owner of his eponymous chocolate shop, suggests freezing a cake in between each step. A frozen cake is much easier to cut, to stack, and to decorate. It won’t get crumbly or fall apart, and a frozen, undecorated cake can stay in the freezer for up to a month.
The first step is to bake the cake. Of course, a cake from scratch, not using a boxed mix, usually comes out the best, but if time only allows to use a mix, that’s OK, too. Don’t follow the box directions. Use a mixer and beat the cake batter for much longer than the one to two minutes that the box recommends. Beating the batter at a medium speed for 10 minutes incorporates air, which will make a cake fluffy. Feel free to add a dash of flavor to a mix by substituting ingredients. Most cakes call for water, but milk will make a creamier cake and measures the same as water because it’s a liquid. A dark, rich beer, such as porter or stout makes a chocolate cake richer than water, while raspberry or pomegranate juice added to a vanilla cake will turn batter a light hue of pink and add a berry flavor. Cooled coffee makes an interesting chocolate cake, while cooled chai tea makes vanilla interesting.
Find out what's happening in Abingtonfor free with the latest updates from Patch.
Don’t be afraid to add a pinch of a favorite spice, such as cinnamon or ginger, or a teaspoon of vanilla or almond or coconut or rum flavoring for a distinct taste.
Use parchment paper to line the cake pans, don’t rely on cooking spray to get a cake out of its pan. Cut the paper to the size of the pan, line the pan with cooking spray, then put the parchment paper down, and spray again.
Find out what's happening in Abingtonfor free with the latest updates from Patch.
Bake the cake according to package directions and let cool completely in the pan. Once cool, remove from the pan and let cool on a rack that keeps the cake a few centimeters from the counter. When the cake is cool to the touch, wrap it in foil or parchment paper, place in a freezer bag and freeze it overnight.
Amrani uses a special commercial freezer that works quickly, so he does not need to leave the cake in the freezer overnight. Since most home cooks don’t have such expensive equipment, leaving a cake in the freezer overnight gets the same effect, and it also makes the project more approachable because it sheds the process down to less than an hour per day.
Day two of cake assembly is when it’s time to cut the cake (for the first time) and tort it, or layer it with more flavoring. Place each cake on the counter and gently mark the cake with a knife exactly where the horizontal middle is. Slice the cake in half horizontally carefully using a serrated bread knife by rotating the cake a little at a time. Don’t try to start at one end and slice through it.
Get creative with the filling and glazes. Think of something to add moisture, such as sweetened coffee, port wine, simple syrup with a dash of flavoring, whatever complements the flavor of the cake. Brush each layer with the liquid. Then start stacking. Put the first, or bottom layer, on a plate and then add the filling. Filling can be any premade jam or curd, such as raspberry preserves or lemon curd or thick pudding, or it can be the same icing that will be on top. Continue to stack and add filling to each layer until the cake is all together. Freeze the cake overnight to make one solid cake, so it won’t slide around when it’s time for icing.
Using the selected icing, buttercream or chocolate, strawberry or sour cream, spread a generous amount on top and smooth with an offset spatula or butter knife. Smooth icing on the sides of the cake, rotating it slowly while spreading icing. This is called the crumb coat, the icing that takes in all the crumbs of the cake. Freeze it overnight again to set.
Now, it’s finally time for the final, pretty layer of icing and decoration. The cake already has its first layer of icing, so this second layer goes on much more quickly and easier than the first. It will be frozen nearly solid, so there won’t be any crumbs. With the last layer, swirl the icing with the knife, or use a spoon to lightly touch down on the icing and pull it away to form peaks.
Once this process comes easily, experiment with icing bags and tips to pipe on designs or write letters. Decorating a cake can be intimating at first, and it will have its share of pitfalls and ugly cakes, but it takes practice to make perfect. If a cake doesn’t turn out as pretty as planned, don’t hesitate to cut it and serve ice cream sundaes or make it into a different dessert by layering it with whipped cream and crumbled cookies.