Health & Fitness
Confessions of a Newly Addicted Soap Maker
It's so much easier than it initially sounds, and totally addictive.


So now I’m making soap, and I find myself in an awkward position.
Last week, I went to a gymnastics class, and I told you I’m not the gymnastics type. This week, it’s the soap, and I’m about to tell you I’m not the soap-making type.
I fear that you’ll begin to wonder if the lady doth protest too much and discard me as a Martha-in-sheep’s-clothing (bless her).
Find out what's happening in Fairfieldfor free with the latest updates from Patch.
The thing is, I’m really not the soap-making type; when I posted a plea for help with my project on Facebook earlier this week, a friend in Brooklyn responded, “What the heck is going on up there?”
I am, instead, the type of person who is always tearing articles out of magazines, bookmarking ideas on the web, and then forgetting about them. This blog is really just a way of ticking some of those projects off my list and giving myself a weekly deadline for doing it.
Find out what's happening in Fairfieldfor free with the latest updates from Patch.
Which is how I found myself making soap on Friday night.
This project ended up being much easier than expected; mainly because I didn't actually make the soap. I looked that up, and it involves sodium hydroxide, which (from beauty-soap-and-bubbles.com) "can give you very nasty burns.” The website also advises, “Don’t forget to protect work surfaces as this stuff can burn straight through." Yeah ... no.
Instead I went the melt-and-pour route, in which you buy soap base from a crafts store like Michael's in Norwalk, melt and customize it, pour into a mold, and everyone survives.
Michael's had almost everything I needed for the project:
- Soap base: I bought a 2-pound brick of goat's milk soap, which is white, and a 2-pound brick of clear glycerine soap, which cost $9.99 each.
- Molds: I picked up a $2.99 tray which included four basic shapes.
- Soap dye: I had read that you can use food coloring as the amount used isn't enough to dye the skin, but why risk it? The dye cost $2.99 for a pack of primary colors.
- Additives: I bought a small pouch of crushed apricot stones for $3.99.
I also used ingredients I had at home, including pureed fresh mint from the garden and essential oils from Enfleurage in New York (enfleurage.com).
I once wrote a story on scents, and the shop owner, Trygve Harris, sold me on the superiority of natural essential oils; there's no chemical undertones. I had lavender, bergamot and ylang ylang on hand.
Finally, I lined the molds with petroleum jelly, the presence of which unnerved my husband and made removal of the soaps much easier once they were done. I highly recommend that step, for both reasons.
I began by cutting off portions of the soap base brick and popping them in the microwave in a Pyrex bowl, using one part white goat's milk soap to four parts clear soap.
Martha's directions (because of course Martha has soap-making directions) are to microwave in 30 second intervals until the soap is melted but not boiling, which probably took about three or four minutes to achieve. I stirred the liquidy soap with a wooden spoon between microwavings.
I wanted to create a few different bars, so I poured the melted based into ramekins and customized them. First mint, which was easy enough -- I mixed in the puree and six or seven drops of green dye, poured it into the mold, and that was that. The puree didn’t give off much of a scent, though; if you want a minty mint soap, add essential oil.
Next was lavender soap. I combined six or seven drops of lavender essential oil, three drops of blue dye, and five drops of red into the base; it came out as a lovely rich-looking and -smelling blue-purple bar. I also threw in some of the apricot stone granules, the amber color of which slightly discolored the final product, but not too badly.
Now I was getting brave, and I started scouring my cabinets for ingredients. I considered utilizing a mini-bar size bottle of whiskey until my husband pointed out soap is instead intended to get rid of the smell of whiskey. In the end I went a rather traditional route: lemon juice and orange peel with a few drops of yellow dye. The orange peel settled at the bottom and looked practically edible in the final product. The juice did give it a lemony smell but resulted in the softest of the soaps; it's already mushing a bit around the edges, and I'm not convinced as to its durability. I do like it, though.
Throughout the project the base kept hardening up as it cooled; I just ran it through the microwave again for 30 seconds or so and kept going.
Also, Martha said to spray the poured soap with rubbing alcohol to eliminate bubbles; another site said witch hazel. I had neither. I did have a bottle of vodka from my grandmother’s last visit, but unfortunately no spray bottle, so my soaps did not achieve Martha-esque perfection. Which is a shame because it would have been great to achieve Martha-esque perfection while substituting Stoli.
I played a bit with the bergamot and ylang ylang essential oils, mixing six or seven drops of each into the base to make the strongest scented soap, coloring it dark red to compliment the warm scents.
Having run out of my molds, I started looking around for other things to pour soap into and settled on pleated paper cupcake liners. (If you're sensing a rather obsessive-compulsive note entering these proceedings, you're right.)
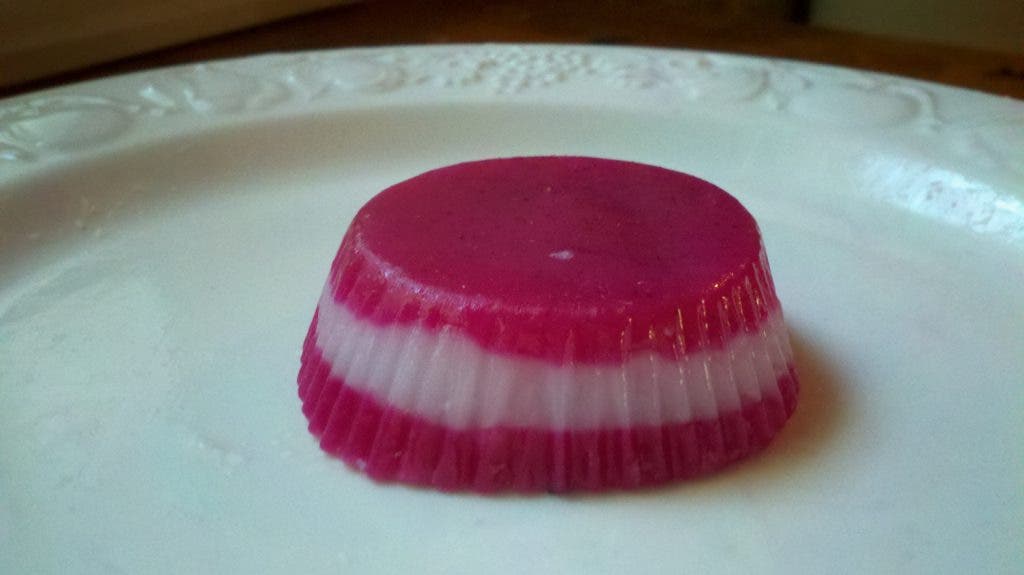
I tried layering; I poured red-dyed bergamot soap base into a liner, let it set a bit, then topped it with white ylang ylang scented base, let that cool, then more red. You can see the final result in the photos.
I was on a roll. Desperate, searching for new molds, I (and I'm not kidding here) grabbed the leftover tiny plastic cream pots from that morning's coffee and poured more of the mint base into them. My husband said they looked like suppositories, and that it was time to stop.
I put them all in the fridge for the night (the websites' instructions said two to four hours, but it was midnight by now). In the morning I hopped out of bed and ran downstairs to my soap. My little jewel-toned scented shapes of satisfaction gleamed up at me, and I've been washing my hands all morning. They actually feel great; softer than normal.
I loved my little project and, using the pour-and-mold method, think it would be great for kids if they have adult supervision (although My Girl is too young at two). One of the best parts of this project was the easy clean-up ... I mean, it's soap.
I’ll definitely make them again; I have a baby shower coming up this fall for which I could create soft-scented pink and blue versions, and it would be a fairly cheap and easy way to generate small holiday gifts at the end of year.
My dilemma, though, is how to present the homemade soap gifts. Handing them over with a jolly, “I made them myself!” feels presenting an arts-and-crafts project from camp ("It's a birdcage! Made out of popsicle sticks!"). Attaching a tag that reads, “Made for you … by me,” seems a touch smug.
Of course you can’t not mention it at all, because then your hard work would be unnoticed, and, let’s face it, may look a little bargain-basement if the receiver thinks they were store-bought.
My solution? Write a blog about it. Distribute the blog to all your friends, and make sure they read it before their next birthday / holiday / party, for which they will, by the way, be receiving soap. Problem solved.