Arts & Entertainment
The Art of Bookmaking
Instruction for a do-it-yourself design that everyone can handle.


When I was in school I took bookmaking classes, which really helped me understand the basics of creating handmade books.
I realized it wasn't that hard after all. Plus, its fun to make something with your hands. It really gives your project that handcrafted feel you just don't see much of anymore.
Here, I want to share how to construct a book from scratch. You can choose any size you want and pick whatever materials suit your concept. There are a few ways to do it, but this one is easy, affordable and doesn't take much time. They would make great gifts as well.
Materials
Find out what's happening in Malverne-Lynbrookfor free with the latest updates from Patch.
- 2 pieces of thin cardboard or thin matte board of the same size, any size you want
- 1 piece of cardboard or thin matte board about 1/4 inches in width
- decorative paper
- any kind of paper for the inside
- glue or double sided tape
- scissors or an x-acto knife
- stapler
- a needle and thread, if needed
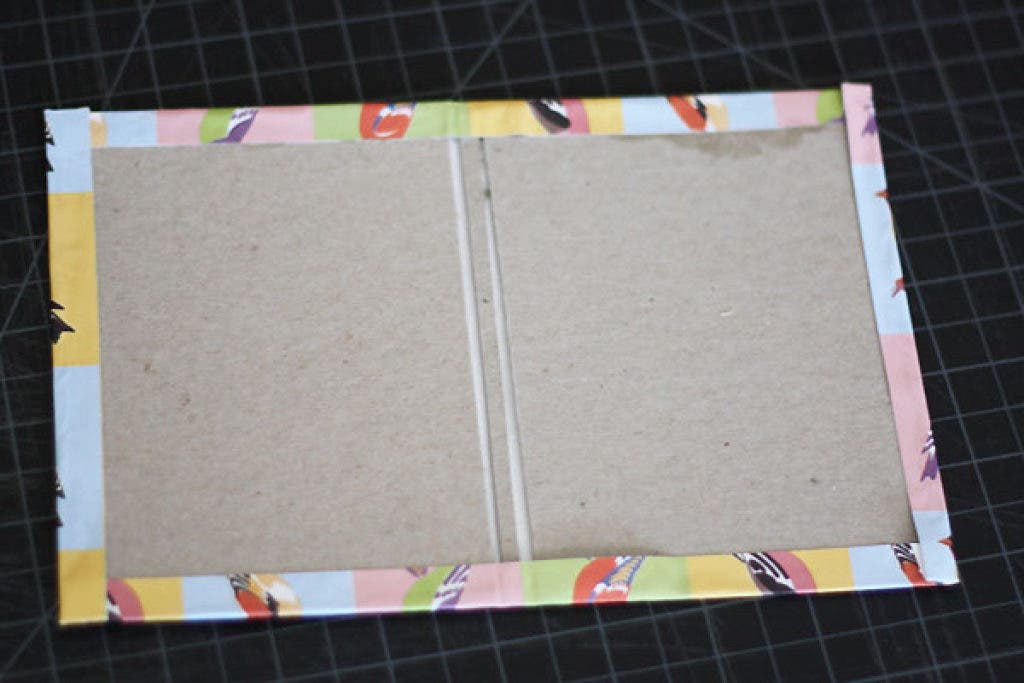
First, gather the cardboard. The two pieces of the same size will be the front and back cover, and the small 1/4 inch piece will be the binding.
Take decorative paper of your choice and lay it flat upside down. Lay the cardboard pieces on top with 1/2 inch extra around the edges. The binding piece should have 1/4 inch or so on each side so there is space in between the covers and the binding.
Find out what's happening in Malverne-Lynbrookfor free with the latest updates from Patch.
Stop by the and on Atlantic Ave. for some decorative paper. You can use wrapping paper, tissue paper or even fabric. You can also draw a design or image on paper and use that as well.
Cut paper to size if needed, then glue cardboard pieces to paper. Make sure you create a nice fold in the corners.
You can find scissors and glue at on Sunrise Highway or the on Broadway.
Now, get your pages ready. Make sure they are cut to size as well. They should fit inside the covers and not stick out. Fold the pages in half. Use a stapler to attach the paper at the fold. If you are using large pieces, try sewing them together at the fold. One section on each end and one in the middle should do the trick.
You can use any paper for this. Drawing paper works well and so does computer paper if you wanted to print out a story or image. should have both.
For the final steps, take another piece of decorative paper and cut it to size. It should be the length of the edge of the cover to the edge of the first page. Do the same with the back cover. You can use a different design or the same as the cover.
Glue the papers down or use double-sided tape if that works. Once you do that the book is done being constructed. Now you can add content or leave as is. That wasn't so hard now, was it? You can have a lot of fun with this project. It's something great to do with your kids too. Especially, if they love to draw and write stories.
Enjoy!