Neighbor News
Shoulder Tilt: The Pro's Secret Weapon
From the Ground Up: How to Build a Pro-Level Transition and Compress the Golf Ball Like Never Before!


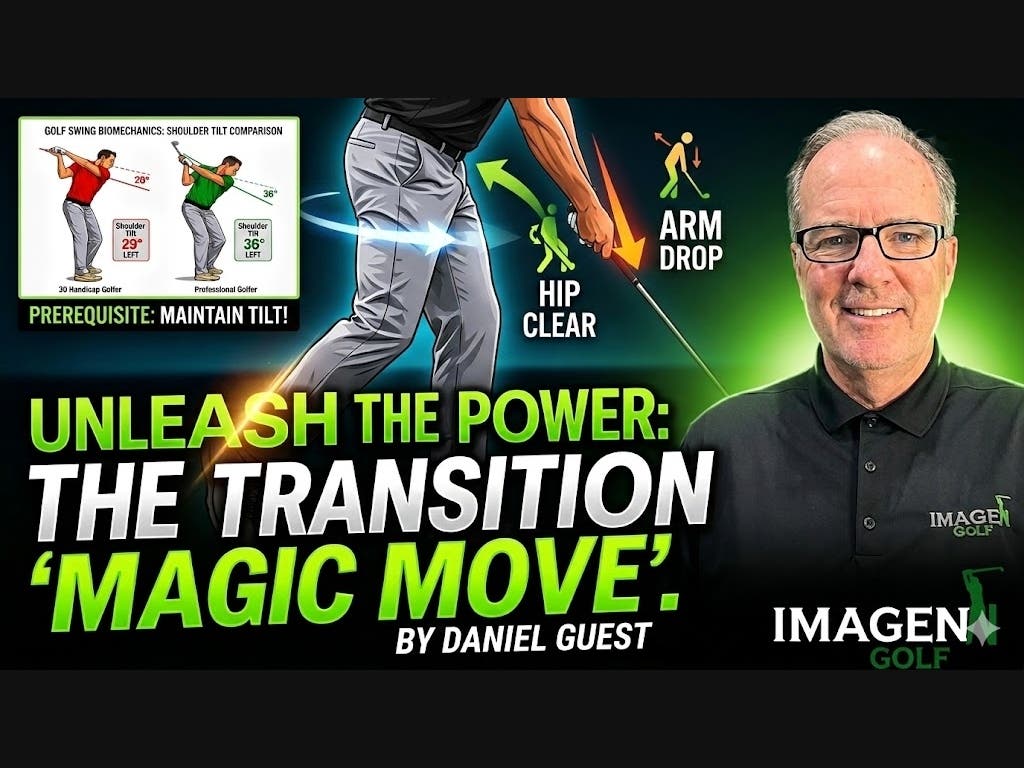
Hey guys, Dan here! Welcome back. Today we are diving into a sneaky, absolute game-changer of a swing thought that separates the high handicappers from the touring professionals.
If you've been struggling with your ball striking, feeling like you're losing power, or constantly battling that dreaded "over the top" slice, I want you to listen closely. We are talking about shoulder tilt at the top of the backswing.
Most amateur golfers hear the word "turn" and they immediately think of turning like they are standing inside a barrel—their shoulders turn completely flat and level to the ground. But the pros? The pros maintain a beautiful, deep shoulder tilt. Their lead shoulder is noticeably lower, and their trail shoulder is pointing high up to the sky at the top of the swing.
Find out what's happening in Doylestownfor free with the latest updates from Patch.
Let's break down exactly why this happens, why it’s going to completely transform your ball striking, and how you can start feeling it today. Let’s get to work!
Why Shoulder Tilt is Your Ultimate Power Move
When you set up to a golf ball, you aren't standing straight up; you are tilted forward from the hips. To maintain that athletic posture, your shoulders must turn on an angle. When you turn flat, you instantly lose your spine angle, and your brain has to make a dozen split-second compensations just to make contact with the ball.
Find out what's happening in Doylestownfor free with the latest updates from Patch.
Here is exactly why mastering this tilt is going to elevate your game:
- It creates a natural, effortless shallowing of the club: When your shoulders turn flat, your arms get disconnected and lift high and steep. From there, your only option is to throw the club outside and chop down on the ball. A steeper shoulder tilt naturally keeps the club on the perfect plane, giving you all the room in the world to let the club just drop right into the slot on the downswing.
- It destroys the "over the top" slice: By keeping that lead shoulder down, you create incredible space for your arms to swing from the inside. If you want to start hitting those beautiful, powerful, penetrating draws, this is exactly where it starts.
- It unlocks tour-level compression: Flat shoulders pull you out of your posture, leading to early extension (the dreaded "goat hump") and weak, flip-wrist contact. When you maintain your tilt, you stay rooted in your posture. You can cover the golf ball, compress it against the turf, and take those beautiful dollar-bill divots after the ball.
The Simple "Feels" to Take to the Course
Biomechanics are great, but we don't want you out there over the ball thinking about degrees and angles. We need simple, athletic feels that you can trust under pressure. Next time you're on the tee, try to internalize these:
- Lead Shoulder Drives Down: As you take the club back, don't just turn your chest to the sky. Feel like your lead shoulder (left shoulder for right-handed players) is pointing down toward the golf ball or just inside it.
- Trail Shoulder to the Sky: At the top of your swing, feel like your trail shoulder is distinctly higher than your lead shoulder. Feel that stretch in your left side.
- Connected Chest and Arms: Let your chest dictate the turn while your arms stay softly connected to your ribcage. Don't lift the arms to fake a full turn; let the tilted rotation of your core carry the club to the top.
The "Tour Tilt" Quick Drill
I want you to try this simple drill at home, in front of a mirror, or on the range before you hit your first ball.
- Take your normal golf posture without a club.
- Place an alignment stick (or a 6-iron) horizontally right across the front of your shoulders, crossing your arms over your chest to hold it in place.
- Make a slow, deliberate backswing.
- The Checkpoint: Stop at the top. Look at the alignment stick. Is it pointing horizontally at the trees in the distance? If so, you've turned too flat!
- The Fix: Adjust your turn so that the end of the stick pointing down is aimed directly at the golf ball on the ground.
Feel the stretch in your back and lead side. That is the feeling of a loaded, dynamic, tour-quality backswing. When you put a club back in your hands, trust that feeling, stay in your posture, and aggressively unwind through the golf ball! You've got this.
Alright guys, let’s pick up exactly where we left off! You’ve put in the reps, you’ve mastered that beautiful, deep shoulder tilt at the top of the backswing. You are loaded, you are in posture, and you have created a massive amount of potential energy.
But here is the brutal truth: if you mess up the very first move down, all of that hard work on your backswing is completely wasted.
Today we are talking about the transition—the exact sequence of how you shift your weight and fire the downswing. This is the "magic move" where speed is truly born, and it’s the biggest difference between a weak, glancing blow and absolutely compressing the cover off the golf ball.
The Amateur Trap vs. The Pro Sequence
When an amateur gets to the top of the swing, their first instinct is usually to hit the ball with their hands. They throw their arms at the ball from the top, their weight hangs back on their trail foot, and their upper body spins out of control. This causes that weak, over-the-top slice we all hate.
The pros do the exact opposite. They swing from the ground up. Their sequence is always: Lower Body ➔ Torso ➔ Arms ➔ Club. In fact, for elite ball strikers, the downswing actually starts before the backswing even finishes. While the club is still traveling back, their pressure is already shifting forward.
Here is exactly how to sequence your weight shift for explosive power:
The 3 Phases of the Perfect Transition
- Phase 1: The Pressure Shift (The "Bump"): As your hands approach the top of your backswing, you need to feel your weight (pressure) shift horizontally into your lead foot. You aren't swaying your whole body forward; you are simply pressing down into your lead heel and big toe. This plants your lead leg into the ground so you have something strong to push off of.
- Phase 2: The Clear (Using the Ground): Once you've bumped that pressure into your lead side, your left hip needs to clear out of the way. Feel your belt buckle violently turn toward the target while your lead leg pushes up and straightens. This is how you use "ground reaction forces" to create effortless speed.
- Phase 3: The Drop: Because your lower body bumped forward and your hips started clearing, your arms now have a massive pocket of space to drop down into the slot. You don't have to pull your arms down; if the lower body fires correctly, the arms will naturally shallow out and whip through the impact zone.
Simple Feels for the Course
When you are standing over a shot, you need simple triggers to initiate this athletic move. Try these out:
- Squish the Sponge: Imagine there is a soaking wet sponge under your lead heel. Before you start swinging your arms down, you have to stomp down and squish all the water out of that sponge.
- Keep Your Back to the Target: As your lower body shifts forward and starts rotating, feel like your upper back stays facing the target for just a split second longer. This creates incredible separation and "lag" that translates to pure speed.
- Skip the Stone: Think about how you would skip a rock across a pond. You wouldn't throw it off your back foot. You would step into your lead side, plant your foot, let your hips lead, and then whip your arm through. The golf swing is the exact same athletic motion!
The "Step-in" Power Drill
To get this feeling ingrained in your muscle memory, this drill is an absolute must-do on the driving range. It will naturally force you to shift your weight correctly.
- Tee up a ball and take your normal setup.
- Before you swing, bring your lead foot all the way back so it is touching your trail foot. (Your feet are now completely together).
- Start your backswing.
- The Trigger: Right before you reach the top of your backswing, aggressively step forward with your lead foot back into its normal, wide stance.
- Plant that foot into the ground, let your weight transfer, and swing all the way through to a full finish.
If you throw your arms from the top, you'll lose your balance and fall backward. But if you step, plant, and fire, you are going to feel a loud, explosive compression that will completely change how you view the golf swing! Keep grinding, trust the process, and get that weight forward!
This is Golf as You've Always Imagined!
Daniel is a Top 100 Golf Coach, The #1 Golf Instructor in PA, a PXG Staff Pro, a World Long Drive Coach and the Head of Golf Instruction at IMAGEN Golf the area's leading golf instruction and advisory firm, host of the IMAGEN Golf podcast and Best-Selling Author of "Unleash The Golfer Within".
For more information visit www.ImagenGolf.com or call 215-595-6299 Reach out to Daniel directly at:Daniel@ImagenGolf.com
For free golf tips and more listen to The IMAGEN Golf Podcast on Spotify, Apple Podcast or wherever you get your podcasts and follow us:
Youtube ImagenGolf
Instagram @ Imagengolf
Twitter @imagengolf
Facebook ImagengolfTikTok @ ImagenGolf
Click the link above to book your first virtual or in person lesson today! Check out our NEW state-of-the-art indoor facility, The Golf Place, in Newtown, PA.