Health & Fitness
Get a Spring in Your Step by Planting a Seedling Garden
A Fun Family Project: Planting an Indoor Seedling Garden
It’s about that time of year when we tire of the usual winter routines and ready ourselves to jump into a new activity. Weather you do this project by yourself or with a child it’s the perfect time to plant an indoor seedling garden. When you plant your seeds now they’ll be strong enough for the outdoors by the time May arrives.
Depending on what you are planning to plant and grow, it’s good to decide the best location for the seeds to get sunlight. It’s also important to think about where the plants will go in the future. Whether you decide to plant them in a large outdoor garden, pots on your deck, or in several areas around the yard it’s good to note how much sunlight is available and if it’s practical for what you are planning to plant.
Find out what's happening in Bethwoodfor free with the latest updates from Patch.
To start your indoor garden, you need six things. These include: seeds (fruit, vegetable, or flower), potting soil, seedling container or flower pots, a pencil, toothpicks, and tape. To start this project, it is best to start with an old tablecloth or in a location that is easy to sweep up. Then, get all the supplies together and prepare to get a bit dirty for this fun, hands-on back to nature experience. It’s sure to excite everyone in the anticipation of spring.
The process of starting a seedling garden is as simple as getting your seedling container and having the child help by putting soil into each compartment. At this point, it’s good to have lukewarm water to wet each seedling compartment or pot to prepare the soil for the seeds. Then, get the seeds you would like to plant. Follow the directions on the package to determine how deep to plant them. It’s helpful to use the eraser end of a pencil to make the holes for the seeds. Your child helper can then put a few seeds into each hole and cover it up with a small amount of soil.
Find out what's happening in Bethwoodfor free with the latest updates from Patch.
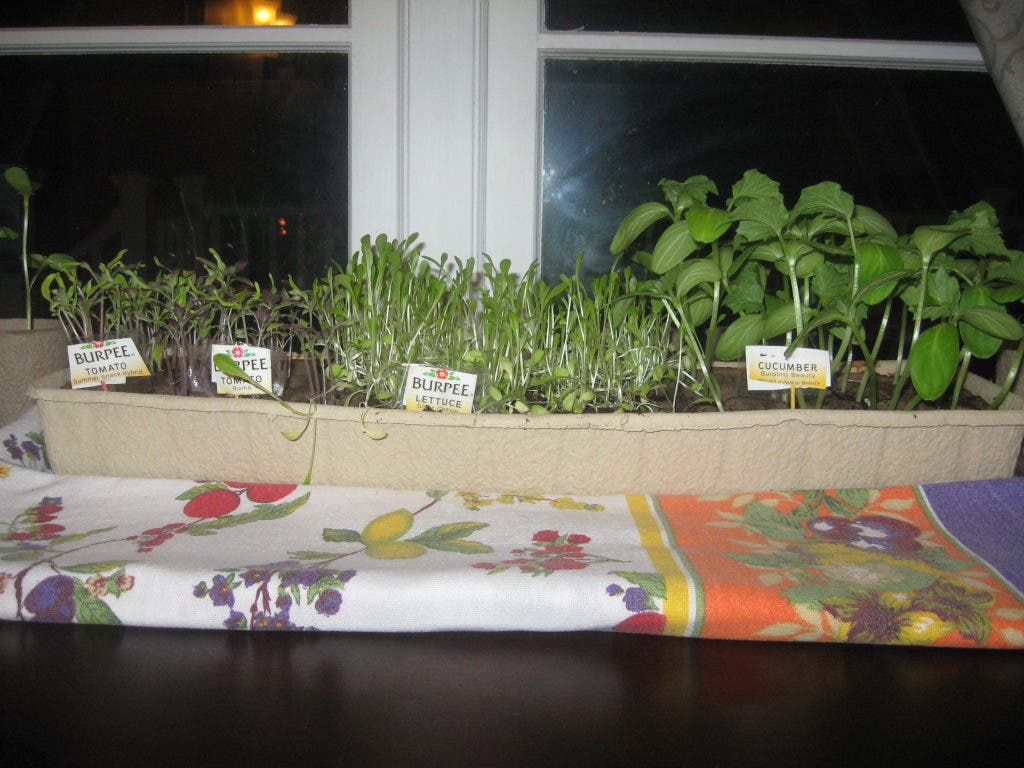
After planting the seeds, cut part of the seed package that shows the plant or flower picture and/or name. Fold this over a toothpick and tape it so it’s on the top portion of the toothpick. Place the tiny sign near the seeds that match the flower, fruit or vegetable seeds that were planted. It will be of great use when your seedlings appear. Make sure that the seeds stay wet or damp daily and get plenty of sunlight. Keep them covered with clear plastic wrap to prevent the soil from drying out until the sprouts appear. Then the plastic wrap is no longer needed.
The process of planting seeds, taking care of them and watching them sprout is a fantastic learning experience. It can also be exciting. My four year old and I decided to guess which ones would sprout first when we planted our cucumber, lettuce, and tomato seeds. It was fun to wait in anxious anticipation. To our surprise, the smallest seeds (the lettuce) sprouted first.
Overall, it’s enjoyable to get your hands dirty and watch the progress of your seedlings growing and changing each day. This activity is sure to help you and/or your family look forward to the upcoming excitement of springtime.