Community Corner
A Trough Party
Making your own trough to plant succulents and miniature plants is cost efficient, and even more fun to do with friends.


In the gardening world, it is trendy to make hypertufa garden troughs for planting succulents and miniature plants.
Hypertufa is simply a man-made imitation of lightweight tufa rock, which can be molded into planters. They are pretty easy to construct and a whole lot cheaper than purchasing a pre-made one. A sizeable trough around 15 inches long can set you back at least $100. The cost of making your own will cost less than $20 in materials, so it is worthwhile to make them.
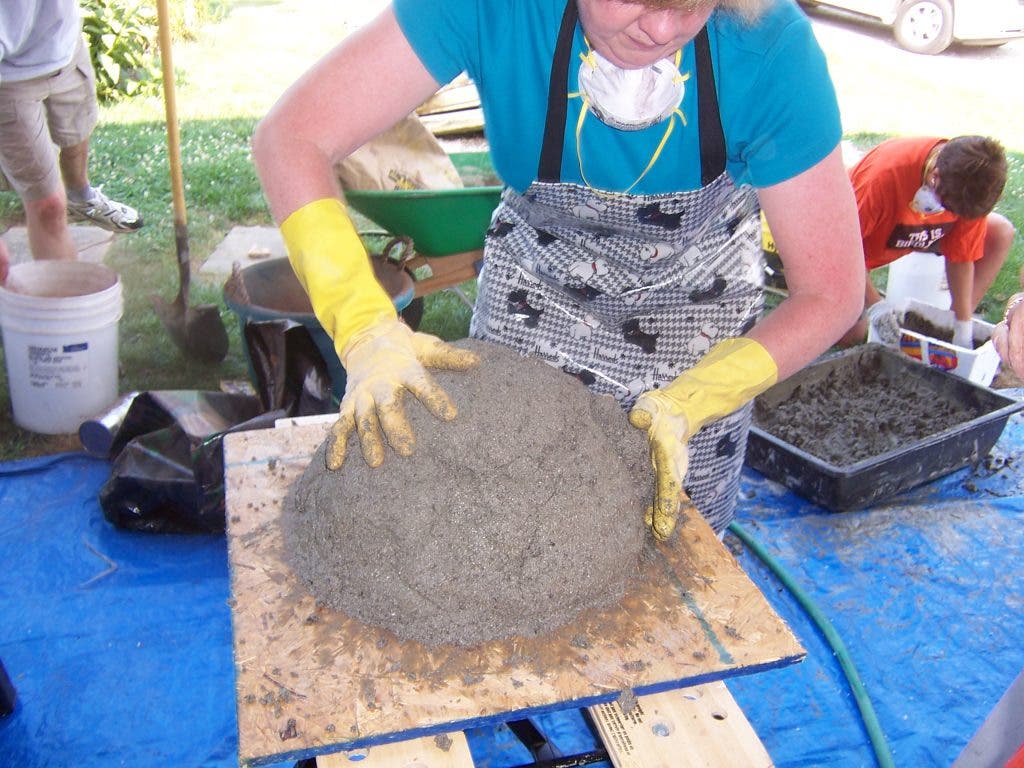
Recently, I invited about a dozen friends over for a trough-making party with instructions that I would provide all the materials and they would just need to bring a mold, with a face mask and gloves. A mold could be a sturdy box, a straight-sided Tupperware container or just an old Styrofoam ice chest.
Find out what's happening in Hunt Valley-Cockeysvillefor free with the latest updates from Patch.
Materials
You need a bag of Portland cement, which comes in 96 pound sizes at the hardware store and will make lots of troughs. Peat moss and perlite or builder's sand are the rest of the ingredients, and are readily available at a nursery.
Find out what's happening in Hunt Valley-Cockeysvillefor free with the latest updates from Patch.
Mixing
Find a large mixing tub and dump in two parts Portland cement, two parts of peat moss, and one part of perlite or builder's sand and mix with a shovel until all lumps are gone. Face masks are important at this stage as the dust can really irritate your throat. Add water from a hose and mix until the mixture resembles cottage cheese. It takes a lot of heavy lifting to mix it thoroughly, which we took turns at and added to the party atmosphere. Take a handful of the mixture and squeeze it; if the ball holds together, it is ready to use.
Molding
Molding and forming the trough is the fun part. Everyone brought their mold inverted onto a sturdy piece of plywood so they could transport it home easily. After putting on gloves, my guests dove into the tub, grabbed handfuls of the mixture and started covering their mold with a two-inch layer of cement mixture. It is important to have good coverage so that the walls are sturdy and won't cave in. I had dowels ready for people to stick into the bottom of their troughs for drainage holes.
After Care
After everyone had thoroughly coated their molds and smoothed the bottom and sides, we took a break and admired everyone's creations. At that point, the troughs are ready to be taken home and cured. Curing simply means that the cement has to dry slowly so no cracks form. To do this, simply mist the container once a day and cover the trough with a piece of plastic to hold in the moisture. You can't rush this step. It will take a couple of weeks to fully harden.
Planting
After waiting impatiently for about a month, the moment of truth arrives and you can turn the hypertufa over and remove the mold. At that time, you can fill with soil and plant with succulents or miniature plants. Your completed trough will last for years outside and will eventually grow moss to make it look like an antique planter.