Arts & Entertainment
The Tissue Box Holder
Instruction and information for a do it yourself design that everyone can handle.



I work out of my home office everyday, so it's important to me that it looks good and exudes smart design. I want to be inspired, not tired! Being that I have allergies, I need tissues everywhere I go. So I thought of a way to make the tissue box look more stylish. I came up with the Tissue Box Holder.
Now I'm sure you've seen these in stores, and some are quite expensive depending on the materials. Well, my project is easy, affordable and it looks great. You can even do it with your kids for a craft project. I would say it can keep them busy for a good hour or so. The reason why I love this idea is because you can customize it and the options are pretty much endless. To top it off, it costs under $10!
First you need to get your materials together.
Find out what's happening in Rockville Centrefor free with the latest updates from Patch.
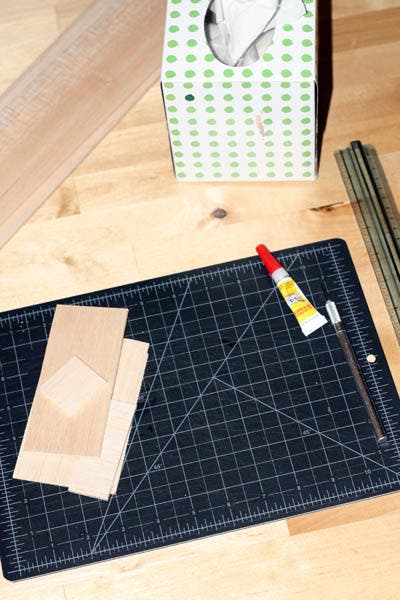
- 2 strips of balsa wood ( I used 4 x 36 in. with a 1/8 width)
- X-acto knife
Find out what's happening in Rockville Centrefor free with the latest updates from Patch.
- ruler
- pencil
- crazy glue or cement glue
- craft glue or Elmer's glue
- contact paper or clear label paper
- box of tissues
Now most of these you probably have in your home already, especially if you have kids. The balsa wood can be purchased at any craft store, like Michaels or AC Moore, and it's usually under $2 a strip. If you use one of their coupons, you can get 40 - 50 percent off too. Now that's a deal! As far as the glue, I recommend crazy glue or cement glue for putting the balsa wood together. The craft glue will come later when you paste the paper on. If you don't have any of these in your home, you can pick them up at Ace Hardware or Rite Aid on North Village Avenue. Pick up a box of tissues while you're there!
You also might find contact paper at CVS on Sunrise Highway. I used clear label paper that I got from an office supply store, but both will work just fine. Once you have all your materials together, it's time to DIY.
1. Measure the tissue box you're using and cut the balsa wood accordingly. You'll probably have to use two pieces per side, which is fine. That's what I did. Keep in mind that you're making a box so that each end piece will have to connect properly to the other. Remember to leave room at the top for the tissues!
2. After you have everything cut, start gluing the pieces together with crazy glue. An easy way to do this is using the tissue box as a guide and connecting the pieces around the box. Just be careful not to glue them together! Now remember that this doesn't have to look perfect. That's the beauty of it. The balsa wood is just the base of the holder, so if there are small gaps in some areas it's OK. It will all be covered in the end.
3. Now that you have the box together, it's time for the fun part. To design the box, you can use just about anything. If you have some cool wrapping paper lying around, put it to some good use. Any interesting paper or fabric would work too. You can even design your own! Use some watercolor paper and paint up something snazzy or have your kids create an art piece and showcase it for all to see. Either way, it's going to look great! I used some old accounting paper from the 1920s I bought off Etsy. I thought since the box was going in my office, it would fit right in. Plus, I love adding a vintage appeal.
4. With the paper, you're going to do the same thing. Measure it and glue it to the sides.
5. The last step is to take the contact paper or in my case, the clear label paper, and lay it on each side. It's important to seal the paper underneath so it doesn't get stained or dirty. Because it already has an adhesive, this part is the easiest. Just make sure you go over the corners as well so you don't have any rough edges. All you have to do is cut it to fit and BAM! You have a stylish tissue box holder that everyone will be talking about.
I hope you enjoyed this DIY project and get inspired to do more. You can use balsa wood for a number of things and it's really easy to work with. Just get creative and have fun. Remember you can do it yourself if you're motivated to do so. All you need is a good idea and a little bit of time and before you know it, you've created something beautiful and unique.